Author: Tim Alatorre

  • Revit Families 102 – Revit Experts don’t Use Locks

    In May I published my picks for Best Revit Blogs on the Web.  Coming in at number 2 was The Revit Kid and Jeff’s Lock Noob Classic Thong.  I still try to read everything Jeff writes but I thought I might stir up a little controversy and make the argument that, contrary to what the thong says, a Revit expert is one who doesn’t use locks.

    I think that Jeff has it backwards.  In my experience the newcomer to Revit wants to lock everything.  I think the initial instinct is to not trust Revit and just lock things down.  Later when this user tries to change something they get a string of messages telling them constraints aren’t met and they end up getting frustrated and removing all the locks anyway.

    therevitkid-locknoobthong

    I’m sure Jeff would argue that the Revit Expert knows how to use locks properly.  I would agree that as you experiment with Revit you learn when to lock and when not to lock.  With Revit family creation that time is only as a last resort.

    So what to do instead of locking?

    1. Reference lines and planes:  Hosting and aligning geometry to reference lines and planes automatically creates a strong connection between them.  The link isn’t quite as strong as a lock, under some conditions it will detach.  But for most purposes it works just fine.  Align geometry to a reference plane and flex your model.  You’ll be surprised how often this works.  Carl Gibson has a great overview of the types of Reference lines.
    2. Parameters:  Instead of locking a dimension to a fixed dimension assign a parameter to it.  Using parameters gives you flexibility to easily change things later, and more importantly it lets the user of the family know what’s going on inside it without having to edit the family.  For example, create a a parameter called Table Thickness and give it the formula 0′ 2″.  This tells the user that the Table is 2″ thick and locks it from changing.  Note that locking a parameter with a formula locks it across all types in the family.

    Locking does have it’s place, but I always try to make a family work without locks first.
  • Revit Families 401 – Data Validation

    As I mentioned in a follow up comment to Revit Families 103 – Formula Basics, Revit still doesn’t allow you to do data validation on values or formulas in families or on table data.

    Still, you can build some functionality into your families to ensure that a value never exceeds a specified range or create warnings for the user of your family.

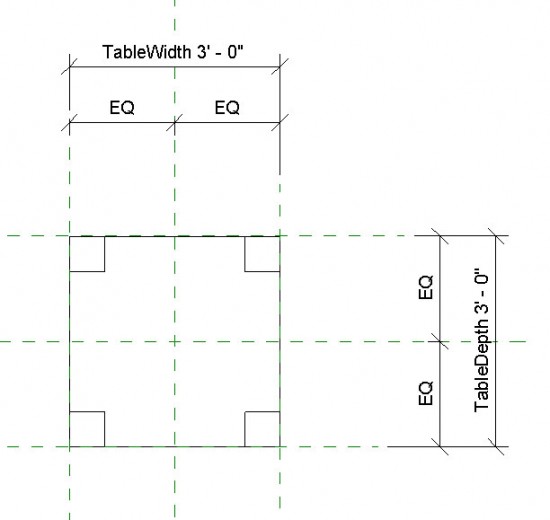
    Lets start with a simple example.  In the plan view below I am showing a basic table.

    Screen1

    Lets say in this example that we never want the table’s width to be greater than 1/2 the depth.  We have a few choices.

    1. Don’t do anything
    2. Display an error message for the user
    3. Default to another value

    (more…)

  • Building Code Nonsense: Accessible Showers

    For those not familiar with it, the California Title 24 Building Standards Code consistes of 10 fairly hefty binders containing over 4,614 pages of small text.

    2007_CBCThe entire set costs a little over $1,000 and Architects are expected to know or at least be aware of all of it.   Not surprisingly, a lot of our time is spent scouring over the code trying to make sence of it all.

    Yesterday a coworker of mine and I stumbled across this little gem of the building code when designing the threshold into an accessible shower stall for an apartment building.

    (more…)

  • 3d PDF’s Are Not Ready for Use with Revit

    AdobeAcrobat9ProExtendedJust a quick note this morning to talk about Revit and creating 3d PDF files.  As we move more and more to creating complete and accurate 3d models we really want an easy way to share these with our clients and consultants.  Consultants are usually technologically savvy enough to open RVT, DWF, or DWG files but what easy solution can we offer our clients?
    Over the last couple days I’ve done some experimentation with creating 3d PDF documents.  Why PDF’s?  The only reason is because everyone is using them and knows what they are.  This is a benefit over the DWF format which requires the download of an additional viewer program.  (Autodesk True View or Design Review)  Being able to have a model embedded in a PDF that a client can open and manipulate is very appealing.  Multiple sheets could be set up with 2d images and 3d “live” models.

    To get started I followed Tim  Huff’s post on “How to get Autodesk Revit models into Acrobat 3D version 8“.  I downloaded a demo version of Adobe Acrobat Pro Extended and gave it a try.  My results were very disappointing.

    Here is why 3d PDF’s are not ready for use with Revit:

    1. Even after following Tim Huff’s directions exactly I could not get the Print Screen key to capture a Revit model.
    2. Importing a DWF into Acrobat worked, however with more complex models (an actual building with linked RVT files and design options) the building was exploded and scattered in 3 dimensions making it unusable.
    3. Importing an IFC file worked, however Revit doesn’t exported linked RVT files in the IFC.  So you are limited once again to very simple models.
    4. Navigation in a 3d PDF is not intuitive.  I was getting frustrated manipulating the model and trying to explain how to navigate to someone not familiar with 3d models would be nearly impossible.
    5. Paying an extra couple hundred dollars per licence for the Extended version of Acrobat is a hard sell when Autodesk offers DWF creation for free.
    6. Probably most importantly, the files size of a 3d PDF was substantially larger than a DWF file.  Depending on the model it was anywhere from 2 to 3 times larger.

    I had high hopes for 3d PDF’s but for now we will be staying with the DWF format.  It’s a little inconvenient to require a client to download another program, but it’s much better than the time and cost required to make larger less functional (or unusable) 3d PDF’s.

  • LED Streetlights for Walnut Creek, Thanks to Federal Stimulus Funds?

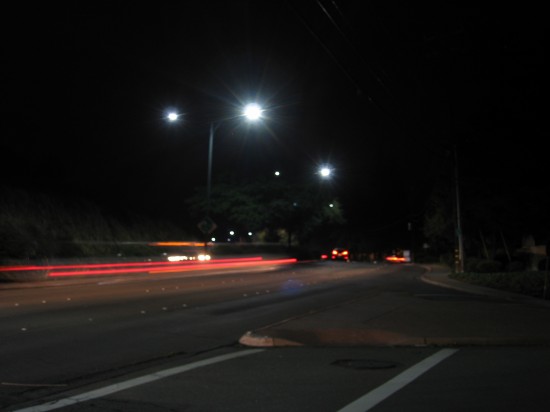
    New LED Streetlights at the corner of Ygnacio Blvd. and Montego, Walnut Creek, CA
    New LED Streetlights at the corner of Ygnacio Blvd. and Montego, Walnut Creek, CA

    Driving home tonight I noticed LED streetlights emitting a soft white glow over parts of Ygnacio Blvd, here in Walnut Creek.  As of this evening the lights only extend the 3/4 mile stretch between N. Civic Dr. and Marchbanks Dr. and a couple random streetlights West of N. Civic Dr. and East of North Broadway.  Three quarters of a mile is not much considering Ygnacio Blvd. is over 7 miles long and is only one of several major streets in the city.

    The lights emit a very natural cool white as opposed to the amber tint cast by the current high pressure sodium lights that are located throughout the rest of the city.  The benefits of LED are incredibly low energy consumption and a ridiculously long life time; 75,000+ hours compared to the 12,000 to 24,000 hours of high pressure sodium or 1,000 hours of an incandescent bulb.  However, due to the fact that they emit a white light, and therefore a broader spectrum of wavelengths, they do result in more light pollution.

    Walnut Creek already has a policy in place to replace all of the traffic signals with LED lights (walnut-creek.org: Signals – LEDs and Battery Backup), however I found no mention on the cities web page of any plans to replace the streetlights.  The city already spent $1.46 million of Federal Stimulus dollars to resurface 1 mile of Civic Drive and it apparently gets an additional $677,000 for energy efficiency and conservation projects (Contra Costa Times 4/24/2009: Walnut Creek gets slice of stimulus pie).  Replacing streetlights with LEDs has been a popular use of stimulus money.  San Jose, Milwakee, and Missouri City, Texas are among the cities doing so (USA Today 3/3/2009: More cities tap stimulus package for LED streetlights).  Recovery.gov lists a few projects for Walnut Creek, including a contract for $58,615 with One Line Power Systems, Inc.  The company, located in Walnut Creek, has no website and I was unable to find any information about what the company does.

    It is unclear at this time whether the US taxpayer is opening their wallet for our new street lights, but I for one, am happy for the new light being cast on our city.

    UPDATE:  January 8th, 2010

    As of today the city has replaced 126 fixtures stretching nearly two miles from Oakland Boulevard to Marchbanks Drive.

    Almost two months after they were installed the Contra Costa Times finally reported yesterday that the city of Walnut Creek paid $87,000 for the install after receiving a $17,950 rebate from PG&E.   A PG&E spokesman said they were able to offer the rebate because of stimulus funding.  It also appears that PG&E hired the contractor to install the lights.

    According to the Contra Costa Times the city’s energy savings have been dramatic.  The city is paying $726 $7,230 per month to power the new fixtures, down from $14,080 a month.  Energy usage decreased to 5,700 kwh, less than half the energy the original fixtures used.

    UPDATE:  January 22nd, 2010

    Thanks to grandcanyondave for providing a link to PGE’s current rate structure.  This give us a little more insight into the cost savings of switching to LED lights.  The following numbers show a typical scenario similar to what the city may have been paying previously and currently.

    According to PGE’s current rates:

    126 HPS 250 watt fixtures x $0.567 x 200 hours/month = $14,288/month

    126 LED 150 watt fixtures x $0.295 x 200 hours/month = $7,434/month

    According to grandcanyondave the city previously had a mix of 125 and 250 High Pressure Sodium fixtures, and 200 hours/month is a little low if it is late in the year, however I think these numbers help give an idea of the cost associated with street lighting.